...
When you open the link you received, a browser window will open with a page like this one:
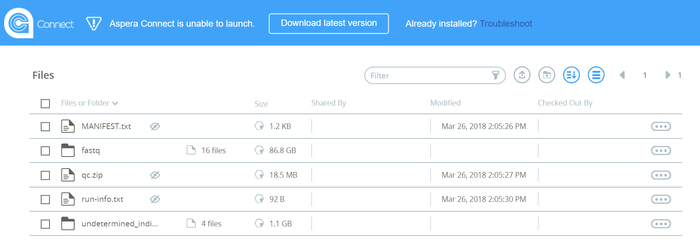
Install Aspera Connect
Note the message in the top of the screen. It will appear the first time you download from Aspera Connect on your PC.
This software is required for downloading files from Aspera.
...
The software Aspera Connect needs to be installed before download.
If you already have Aspera Connect installed, skip to the next step.
Click "Download latest version".
A file with an ".msi" extension will be downloaded to your PC.
...
Follow the installation instruction (simple next→ ... →I agree→ agree ... → ... → Finish).
Note: you will be asked to close all web browsers. Please save your work if you need to.
After install, you will see the software icon ![]() at the bottom right of your desktop
at the bottom right of your desktop ![]() or after you click the small
or after you click the small ![]()
...
The next time you open the link you will see a similar page, with a different message at the top:
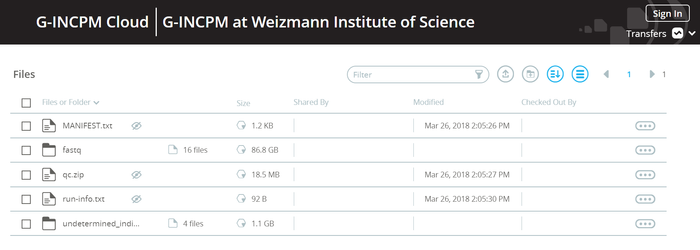
Choose download destination
This is an optional step. By default, Aspera Connect will download files to your Downloads folder.
To change this, do the following:
Right-click on the software icon ![]()
Click "Preferences"
Click "Transfers" tab:
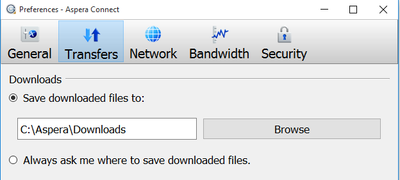
Then, either click "Browse" to select a different folder, or choose "Always ask me where to save downloaded files" instead.
Click "OK" to save changes.
Select files and/or folders for download
...
After selecting the files, click the download icon at the top left of the screen: ![]()
The downloaded files/folders will be saved in the destination specified in the Preferences.
If "Always ask me where to save downloaded files" was selected, you will be prompted to select a destination folder before download starts.
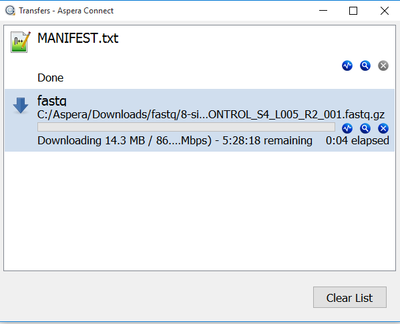
View download list
Clicking Aspera Connect icon ![]() will open the transfers window where you can view download history, as well as on-going downloads:
will open the transfers window where you can view download history, as well as on-going downloads: